Showing posts sorted by relevance for query installing grab bars. Sort by date Show all posts

Wednesday, March 15, 2017

A Buyer's Guide to Choosing Bathroom Safety Products

Read article : A Buyer's Guide to Choosing Bathroom Safety Products

Safety in the bathroom has to be priority #1. That's where up to 70% of home accidents happen. Outfitting a bathroom for safety doesn't have to be complicated or costly.

Start With Grab Bars And RailsMetal grab bars, attached strategically to walls in the tub and shower area, offer a steadying brace for those who need help getting in and out of the bath and shower and when standing in the shower. Grab bars generally range in length from 12" to 42" and are up to 1-1/2" in diameter. Textured or brushed finishes offer more traction, especially when wet.

Bathtub grab bars and rails that clamp on to the tub itself offer support when getting in and out of the bathtub without the permanence of drilling into walls.

Be sure to read all product descriptions carefully and look for the weight the bar or rail you're considering is able to bear, usually up to 250 pounds. You want to be sure it can support the full weight of the person grabbing onto it. Some bars may only provide help to steady people, but not necessarily support them if they slip and grab hold.

When stability is the goal, look for bars and rails that attach securely; a product that uses suction cups, for example, may only provide some aid rather than full support.

Put Safety Inside The Bath And Shower Next On Your List A wide variety of products are available for people who need to sit down to shower. Theshower chair, seat or bench allows the user to sit at chair height in the shower when unsteady or unable to stand for long periods or when the movement of getting into a tub is too difficult or no longer possible.

The design features you choose should match up with the needs of the user. Choices start with a simple stool design; many allow you to build on that, adding a back and/or arm support as needed.

Bathtub transfer benches, seats and boards allow the user to sit down at one end, positioned outside of the tub, then swing their legs over without having to actually climb over the side to get in.

For walk-in showers, a mobile shower chair that rolls right in is a great option.

One more alternative for narrow tubs where a shower chair will not fit is a shower stool.

No matter which of these products is the right one, look for a design that allows water to drain, meaning less pooling and risk of staining or other signs of wear. Cutouts may be available for resting a handheld shower and for grabbing the chair to adjust it; cutouts in the center of the seat section make personal cleansing easier.

An adjustable leg design allows you to customize a chair or bench for the user's height and allows more than one user to sit comfortably. Always look for sturdy, wide legs with grips on the ends to offer better traction on a wet surface. Shop for styles made with rust-resistant or non-corrosive materials like aluminum, molded plastic or PVC.

Other specifics to check before you buy include the maximum weight it can bear; if the user is over 250 lbs, look for models in bariatric sizes that can usually accommodate up to 400 lbs. Consider the weight of the seat itself if it will have to be moved in and out of the tub; a design that folds is a good option if others are using the same bathroom. And finally, if using in a stall shower with a door closure, measure the space carefully to be sure the chair will fit inside it with the door closed (some prefab showers are very narrow).

Make Easy Adjustments To The Toilet When bending is difficult, either because of a bad back or knee problems, getting on and off the toilet can be a challenge. Simple adjustments can make a huge difference: by raising up the seat, there's less movement needed to sit down. Installing atoilet riser under an existing toilet seat effectively lifts the seat by about 5". Clamp-on or locking raised toilet seats go right on top of the existing toilet, usually without any tools.

Adding arm rails or handles provides that much more support, though may not be necessary if the user already utilizes a walker. As with grab rails and shower chairs, the more support needed, the more securely attached the item should be.

Seats are available with different cushioning, often a personal preference. Choosing a seat with a deep front recess for easier hygiene might be an important consideration.

When support only is needed for getting on and off the toilet, consider a toilet rail. Another option is a toilet safety frame"”think of it as a grab rail that extends around both sides of the toilet. On some models both the height and width can be adjusted for a better fit.

For people who are confined to bed and unable to walk to the bathroom, a bedside commode is a useful option. Many commodes can also be used over a toilet to create a raised seat effect. A lifting commode has a mechanism that uses a person's own body weight to help lift them up. Commode liners make emptying the pail easier.

Tuesday, February 28, 2017

Home Renovation for the Golden Years

Read article : Home Renovation for the Golden Years

“I never had to use the bar until now, but I’m grateful it was already there,” he said.

More than one out of four Americans age 65 and older fall each year and one in five falls cause serious injury, according to the Centers for Disease Control and Prevention. The city Department for the Aging said there were nearly one million adults age 65 and older living in the five boroughs of New York in 2010, but that number is expected to rise to about 1.35 million in 2030. As the city’s population ages, officials are urging homeowners and landlords to make age-in-place fixes.

“Something as simple and cost-effective as installing a grab bar can prevent debilitating falls and literally save lives,” said Donna M. Corrado, the commissioner of the Department for the Aging.

More than 85 percent of older Americans want to stay in their current home rather than move elsewhere, a 2010 survey by AARP found.

Iraida Gonzalez, 68, is one of them. She wants to live for as long as she can in Northern Manhattan in a building that is part of the Fort George Vistas NORC, an acronym for Naturally Occurring Retirement Community.

Photo
A movable island is among the suggestions for a kitchen that is wheelchair- and walker-friendly. This kitchen was designed by Victor A. Mirontschuk and is in the Criterion in Jersey City.Credit Victor A. Mirontschuk

Ms. Gonzalez and her husband, Serafin Baldera, 73, have had numerous health problems, including temporary sight loss, diabetes, arthritis and carpal tunnel syndrome. She used to grab the towel rack in the bathroom to help her get around. “It was scary because I knew it wasn’t the best thing to use,” she said.

Ms. Gonzalez recently received three free grab bars, a sturdy bathmat with suction cups to prevent it from moving, and some night lights, thanks to a grant secured by Isabella Geriatric Center, the nonprofit group that operates the NORC program in her building.

The organization worked with students from the Columbia University School of Nursing to conduct home assessments to identify residents at risk for falls based on their medications, medical history, level of activity and fall history. Then Charles Morano, a physical therapist and the owner of Morano Rehabilitation Home Services in Manhattan, conducted home safety assessments for the individuals found to be in danger.

Workers installed grab bars for Iris Boteler, 99, who said she had difficulty walking because of arthritis and other ailments. “You need things to support you,” said Ms. Boteler, who has lived in her building, also a part of the Fort George Vistas NORC, for about 45 years.

Depending on the items used, minor modifications can cost from several hundred to about $2,000. But if you have more money to spend, customization is key, said Barbara S. Roth, an interior designer and a founder of Camille Rossy, a design firm in Manhattan.

Photo
The aging-in-place renovations undertaken by Joyce Jed and Arnold Wendroff include an open kitchen and living area.Credit Emon Hassan for The New York Times

Ms. Roth described a client — a woman in her early 50s with multiple sclerosis — who wanted more cabinet space for her small, dated Murray Hill kitchen. But a place for a stool near the stove and counter was deemed as important as storage because it was getting harder for the woman to stand for long periods.

Although no one likes to talk about age, health and physical disabilities, Ms. Roth said it is important to discuss these issues so an expensive renovation doesn’t become obsolete in a few years.

Because the client’s illness can lead to blurred or double vision, Ms. Roth also talked about installing extra lights and the importance of color contrast in the kitchen so the client could easily determine where the stovetop ended and the counter began. Her client chose ivory and white for the kitchen cabinets and backsplash, and black for the stove top.

“The goal was to not make the new kitchen look institutional,” she said.

For large or open kitchens, installing a movable island, either on wheels or with legs that have felt on the bottom, can be an easy addition, said Victor A. Mirontschuk, an architect and chairman of EDI International, an architectural firm with an office in Manhattan.

“Movable islands give people flexibility because you can push it out of the way,” to provide space when needed, he said, if a walker or wheelchair becomes necessary.

Photo
When renovating, Ms. Jed asked for a wide ledge around her bathtub so she can sit on it and “swing my legs over.”Credit Emon Hassan for The New York Times

Mr. Mirontschuk has designed movable islands for several multifamily developments. Although standard kitchen counters are about 36 inches in height, building an island at 34 inches or lower would also comply with regulations from the Americans With Disabilities Act, he added, because a lower counter works better for someone in a wheelchair.

Some people decide to make home modifications before the need arises.

Amy Lynn, 59, a benefits administrator for the town of New Canaan, Conn., said she had been waiting for years to redo two dated bathrooms in her raised ranch in Monroe, Conn. So when Ms. Roth advised her to shop for grab bars and a comfort-height toilet, which is about two inches higher than a regular toilet and makes the sitting-to-standing motion easier, as well as for new tiles and a sink, she was surprised.

“I just wanted new bathrooms, so I wasn’t thinking about what happens when we get older,” Ms. Lynn said. But with her knees already bothering her, the additions now “makes complete sense” and cost her only an additional few hundred dollars.

Ms. Lynn said she spent about $12,000 to renovate two bathrooms. Her master bathroom has a new shower stall with a built-in corner seat, a removable shower head and niches so shampoo bottles are kept off the floor. The other bathroom still has a tub, but the old glass door was removed and replaced with a shower curtain.

A walk-in shower is ideal for people with leg and vision problems, since it gets harder to step in and out of a tub as you age, said Chrysanne Eichner, a senior occupational therapist at Memorial Sloan Kettering Cancer Center in Manhattan.

Photo
A pullout kitchen drawer with pegs and a removable caddy from Häfele allow easy access to dishes.Credit Dan Smith

Building industry professionals are taking note. Since the National Association of Home Builders started to offer a Certified Aging-in-Place Specialist program in 2002, nearly 7,000 contractors, architects, interior designers and occupational therapists have become credentialed by attending a three-day course, according to Elizabeth Thompson, a spokeswoman for the association.

Erik Listou, a founder of the Living in Place Institute, a professional training firm, said about 200 people have taken its Certified Living in Place Professional class, which started about a year ago. The firm offers the two-day program nationwide.

“These certifications bring industry professionals, like therapists, contractors and product makers to put ideas together” to make homes safe and accessible, Mr. Listou said.

Without divulging any specific data, Moen, a manufacturer of bathroom and kitchen products, said the market for its bath safety line has expanded over the past three years, after it started offering more stylish grab bars that match other bath products.

“When you remove the stigma that bath safety isn’t attractive, it invites consumers to purchase,” said Chris Nealon, a Moen product manager.

Photo
Iris Boteler, 99, lives in a NORC, or Naturally Occurring Retirement Community, in Northern Manhattan. She recently received a gift of grab bars through a nonprofit agency.Credit Emon Hassan for The New York Times

Joyce Jed and her husband, Arnold Wendroff, both 74, are ahead of the game at their home on the parlor and second floors of their three-story rowhouse in Park Slope, Brooklyn. Ms. Jed, a horticultural therapist, said she started to weary of the many steep steps she had to climb inside her home every day. If she is bothered now, she wondered, how would it be in a few more years?

Since the couple knew they wanted to stay in their home, they decided to spend about $150,000 to fix up their ground-floor space, which over the years had primarily been used to house visiting family and friends. They chose to widen a hallway and two doors, open the back room to install an open kitchen and living area, and add windows for more light, among other things. Ms. Jed said much of her focus was on the design of a new bathroom with a walk-in shower and a wide ledge on the side of the bathtub so she could sit and “swing my legs over” to get in.

Soon after the construction wrapped up in April, the couple’s granddaughter Alyssa Jed was accepted by the Fashion Institute of Technology as a freshman and needed a place in the city. So for now, she is enjoying living on the renovated ground floor. But her grandmother said she feels good knowing that the ground-floor apartment is in move-in condition for the day that she feels even less inclined to climb the stairs.

“It was a big undertaking, but I’m glad we did all of this while we’re spry and alert,” Ms. Jed said.

Renovations that help people’s mobility will reduce social isolation as we age, said Kimberly S. George, the executive director of Rebuilding Together NYC, a nonprofit that helps seniors and disabled low-income residents improve the accessibility of their homes.

“Ideally, you shouldn’t rely on family members or friends to help you get around the house,” she said. “You don’t want your own home to be a hazard.”

Correction: January 15, 2017

A cover article on Jan. 1 about home renovations that can help older residents stay in their homes misstated the length of a certification course offered by the National Association of Home Builders. It is a three-day course, not one-day.

Continue reading the main story

Thursday, January 25, 2018

Simple Changes for Making a Home Senior-Friendly

Read article : Simple Changes for Making a Home Senior-Friendly

Dear Savvy Senior,

What tips or products can you recommend to help make a home safer and more convenient for aging in place? My husband and I are in our 70s and don't have the money for any big renovations, but we want to do what we can to stay in our house as long as possible.

--Homebodies

Dear Homebodies,

There are lots of small adjustments and simple modifications you can do to make your home safer and livable as you age that are very inexpensive or completely free. Here are several to consider.

Fall-Proofing

Since falls are the leading cause of home injury among seniors, a good place to start is by picking up any possible clutter that can cause you to trip like newspapers, books, shoes, clothes, electrical or phone cords. If you have throw rugs, remove them or use double-sided tape to secure them. And if you have stairs, consider putting handrails on both sides.

Good lighting is also very important, so add lamps or light fixtures where needed, and install brighter full-spectrum bulbs in existing fixtures to improve visibility. Also purchase some inexpensive plug-in night lights for the bedroom, bathroom and hallways, and consider installing motion sensor lights outside the front and back doors and in the driveway.

In the bathroom get some non-skid bath rugs for the floors, put a non-slip rubber mat or self-stick strips on the floor of the tub/shower and have a carpenter install grab bars inside the tub/shower.

And in the kitchen, organize your cabinets so the things you use most often are within easy reach without using a step stool.

Simple Modifications

Growing old can also bring about various physical limitations which can make your home more difficult to use. Some simple solutions, for example, that can help weak or arthritic hands is to replace round doorknobs with lever handles, or get some inexpensive doorknob lever adapters. The same goes for twist knob kitchen or bathroom faucets. You can easily replace them with lever faucet handles that you can purchase for a few dollars in most hardware stores, or get a single lever handle faucet installed.

In the kitchen, you can make your cabinets and pantry easier to access by installing pullout shelves or lazy susans. And D-shaped pull-handles for the cabinets and drawers are also recommended because they're more comfortable to grasp than knobs.

In the bathroom, consider getting a hand-held adjustable shower head installed and purchasing a shower or bathtub seat so you can shower from a safe seated position if need be. And for easier toilet access, purchase a toilet seat riser for a few dollars. This can make sitting down and standing up a little easier, especially if you're 6" or taller.

And, if you get to the point where you need to use a walker or wheelchair, you can adapt your house by installing ramps on entrance steps, and mini-ramps to go over high entrance thresholds. And, you can widen the doorways an additional two inches by installing "swing clear" offset door hinges.

More Tips

For many more tips, visit The Fall Prevention Center of Excellence, and see "The AARP Home Fit Guide" which offers dozens of modification suggestions to make your home safe and livable as you age.

Or, if you want personalized help, get an in-home assessment with an occupational therapist, or OT, who can evaluate your home, make modification recommendations and refer you to products and services to help you make improvements. Medicare will pay for a home assessment by an OT if prescribed by a doctor. Ask your physician for a referral.

Send your senior questions to: Savvy Senior, P.O. Box 5443, Norman, OK 73070, or visit SavvySenior.org. Jim Miller is a contributor to the NBC Today show and author of "The Savvy Senior" book.

Thursday, November 23, 2017

Tips for bath time safety

Read article : Tips for bath time safety

"); return false; } }); } }); }); function printExec(generatePage){ var s= s_gi(s_account), overrides = {}, name = 'print'; overrides.linkTrackVars = 'events,prop48,eVar48,eVar5'; overrides.linkTrackEvents = 'event3'; overrides.eVar5 = name; overrides.events = 'event3'; overrides.prop48 = s.eVar48 = s.pageName + ' | ' + name; s.tl(this, 'o', name, overrides, function() { if (generatePage) { window.open('/content/cro/en/health/news-archive/z2009/July/tipsForBathTimeSafety.print.html','win2','status=no,toolbar=no,scrollbars=yes,titlebar=no,menubar=no,resizable=yes,width=640,height=480,directories=no,location=no'); } else { window.print(); } }); return false; } function emailExec(){ var s = s_gi(s_account), overrides = {}, name = 'email'; overrides.linkTrackVars = 'events,prop48,eVar48,eVar5'; overrides.linkTrackEvents = 'event3'; overrides.eVar5 = name; overrides.events = 'event3'; overrides.prop48 = s.eVar48 = s.pageName + ' | ' + name; s.tl(this, 'o', name, overrides); jQuery('.emailPopover').dialog('open'); return false; }

Consumer Reports News: July 20, 2009 11:03 AM

image

Anyone who’s bathed young children knows it can be a lot of fun, if a bit messy. But getting splashed isn’t the only thing to watch out for at bath time. Accidental injuries in bathtubs or shower units account for about 43,600 visits to U.S. emergency rooms every year, with slips and falls accounting for around 8 in 10 accidents, according to research from the Nationwide Children’s Hospital in Ohio.

Kids age 4 or younger are most at risk of injury, and bath tubs account for more injuries than shower units. A combination of slippery surfaces, water, and hard edges, such as faucets, can spell disaster for small children who are still a bit wobbly on their feet.

Children that age tend to hit their faces or heads when they take a tumble, doctors say, because they haven’t the strength to break their fall with their hands or arms, and they have a relatively high center of gravity. The study found that cuts and bruises to the face or head were the most common injury.

Doctors say there needs to be more research to establish standards for safe, nonslip surfaces for bath tubs and shower units. They say these types of accidents often happen too fast for the parent or caregiver to react, even when they’re keeping a close eye on bath time.

What you need to know. The doctors who did the study made these recommendations for safe bath times:

  • Consider installing grab bars in the tub
  • Use nonslip mats both inside and outside the shower unit or tub
  • Make sure glass shower-unit enclosures are shatterproof
  • Check water temperature carefully
  • Always supervise young children in the tub or shower.

—Anna Sayburn, patient editor, BMJ Group

ConsumerReportsHealth.org has partnered with The BMJ Group (British Medical Journal) to monitor the latest medical research and assess the evidence to help you decide which news you should use.

Get more tips on keeping your baby safe during bath time, and for more news and research on children's health, sign up for our free Child and Teen e-newsletter. 

Wednesday, November 15, 2017

What You Need To Know When Designing Your Bathroom (2)

Read article : What You Need To Know When Designing Your Bathroom (2)

December 7, 2016
BOOKMARK THIS STORY

Our blogposts on bathroom designs (see 10 Dreamy Bathroom Designs to Fantasise About and 9 HDB Bathroom Makeovers For Every Budget) may have gotten you excited at the beautiful bathroom designs in Singapore.

But before you start shopping around for your sanitary items, here's a quick guide on the factors you should take into consideration, so that you will not end up with an incompatible item for your bathroom.

Basin

There are a few types of basins in general (see image below). Homeowners today prefer the countertop as they fit in with the modern décor. Due to space constraints however, many opted for wall mounted ones instead.

collage

Images credit: lavabostore.com, ferrara.com, de-lune.com, bathshop321.com

The choice is pretty much a personal decision and preference for the general design and outlook and well, budget. Some things to take note of are:

  • The available space
  • The profile of your bathroom users
  • Where your basin connections are:
    • Water supply pipe locations
    • Water discharge to main sewage location – if they are on the wall, you will have to skip some freestanding basins. Take note of the measurements before shopping for the basin.

If you have young kids or living with elderly parents, always go for function and safety first. In such cases, the wall mounted and semi-recessed basins are much more practical as it puts the useable bowl area closer to the user. If they have to sit or stand on a stool to use the bowl, they don’t have to stretch too far.

Also, consider installing sturdy grab bars on the areas around the basin for surer support. Select bars that can double up as towel bars too.

Basin taps

Homeowners should select the basins first before buying the basin taps. The design of both the basin and the tap have to go well together. Basins typically pose more restrictions due to the size. The specific characteristic of the basin may also pose requirements for the tap. For example, if a countertop basin is selected, then the basin tap will need to be a taller one.

Shower Mixer

There are two kinds of shower mixer systems – exposed and concealed.

Crestial-Reflection-C335541-exposed-shower-mixer

Exposed shower mixer - where you can still see the valves amd sometimes, the pipes.

Keuco-Elegance-concealed-shower-mixer
Concealed shower mixer - except for the handle and control plate, everything else is concealed behind the tiles.

Before deciding on the type of shower mixer system, first bear in mind the building regulations, as some of the older buildings do not allow water supply piping to be concealed. As such, you can only go with the exposed shower mixers. Newer BTOs all come with concealed pipings within the wall, but homeowners need to check if they can install concealed shower mixers due to certain waterproofing issues. When in doubt, check with your interior designer/contractor.

Water Closet

There is a common misconception that all toilet bowls are the same and we just need to select a design we like. Here are some factors you should pay attention to:

Location of existing waste pipe and trap distance

Trap distance refers to the shortest-straight line measurement between the finished wall to the centre of the waste discharge outlet.

traps

Image credit: eaglesplumbing.com.au

Ceramic bodies should not sit on the hole or block the pipe connection to the hole. It's also important to know the difference between “S” trap water closets and “P” trap water closets. The former is suitable for sewage outlet on the floor only, while the latter can be for the floor or the wall, depending on the connection pipes.

Location of existing water supply points

Some newer designs of toilets feature what we call a back-to-wall design. In these sorts of designs, the water supply point will have to be located within the water closet’s ceramic body.

The space available

Always take note of swing doors (bathroom entrance door, shower screen door, vanity unit door) that may be impeded if the water closet is too long. Water closet typically ranges from 500 to 700cm in length.

When choosing the water closet, let the sales consultant know your preference and situation so that they can recommend an ideal one.


Start your renovation journey!

If you are collecting your keys soon, drop us a complimentary quote request and we’ll recommend you five interior firms that suit your style preferences and budget needs, for free! Homeowners who engage an interior designer, following a request for quote, are covered under the Qanvast Guarantee.

For more great local interior ideas and tips, download our app on the App Store and Google Play to discover thousands of interior design ideas!

Friday, February 9, 2018

Delta Shower Doors - Design Your Own Shower Doors In Three Easy Steps!

Read article : Delta Shower Doors - Design Your Own Shower Doors In Three Easy Steps!


delta-logoWhat's This?The last time we remodeled our master bathroom, Ronald Reagan was president, a first-class stamp was 24¢, and the Dow Jones Industrial Average was around 1,900. At the time, we tiled the walls and floor, put in a stock vanity and toilet, and installed a 4’ one-piece shower with sliding glass doors. A few years ago, we replaced the vanity, and the room still looks pretty good overall. Taking a closer look, though, the faucets are getting tarnished, and the glass doors are looking pretty dated and beat. Recently, the folks at Delta offered us an opportunity to try out a new service they are offering in conjunction with the Home Depot. Put down your copy of 1984, and take a look. We’ll show you how easy it is to customize and order your own Delta Shower Doors!
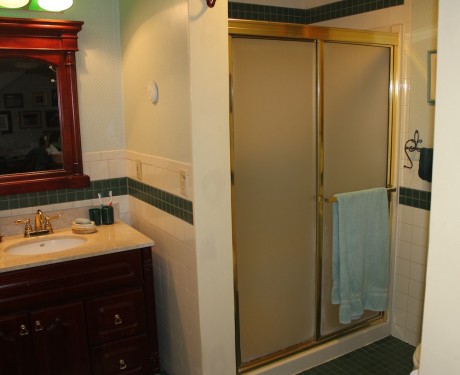
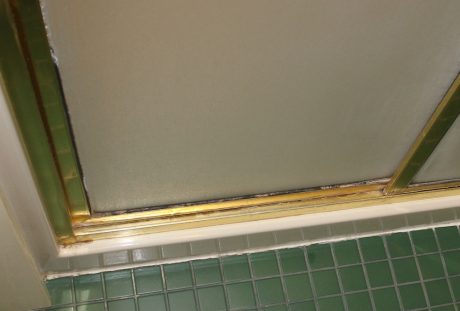
<a href=delta shower doors" width="460" height="375" class="size-large wp-image-25841" />The old 1980’s doors look ok from a distance…<a href=delta shower doors" width="460" height="311" class="size-large wp-image-25889" />But a closer look shows it’s time to update.

The process is fast, easy, and almost fun—not an adjective you normally associate with buying a shower door. To begin, you first select what type of Delta Shower Doors you need—sliding tub, sliding shower, or pivoting shower. If it’s a shower door, you’ll need to know the measurement for the width; there’s a link on the first page that shows you where to measure.
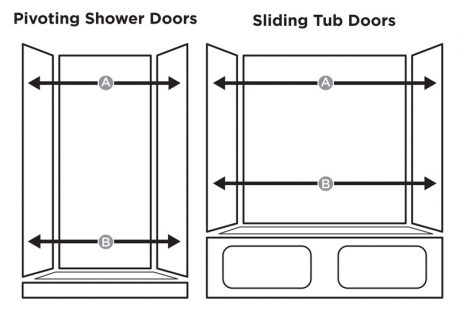
<a href=delta shower doors" width="460" height="311" class="size-large wp-image-25885" />The Delta Shower Doors website shows what measurements you need.

At this point, you have two choices: choice one is to choose your door type and finish the design process online, which is simple and takes just a few minutes. Choice two is for those who hate doing anything online, or who just want to get out of the house, and perhaps go somewhere that has people strolling about in orange aprons, eager to help you get through the design process. It turns out Home Depot is the only place to go since Delta Shower Doors are available in-store exclusively there. Here’s a quick overview of the process from Delta:

[embedded content]

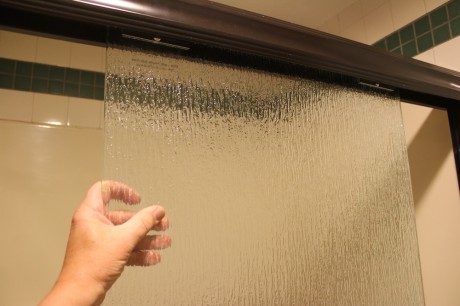
Assuming you want to do it online, after choosing your door type, just click on the red banner that says “Step 1: Choose Your Glass.” Crazy as it sounds, this is where you’ll choose your glass. There are eight styles to choose from, including various patterns and textured glass. If you like to keep an eye on things while you’re showering, you can even select clear glass.

In the next step, you’ll choose the track for your Delta Shower Doors. You can select chrome, nickel, bronze, or polished brass. In each step of the process, prices are clearly shown for each option, and a little monitor on the upper right shows your selections so far, along with a running total cost. There is also a picture on each page, and whenever you make a selection, the picture is updated automatically to show what your door will look like.
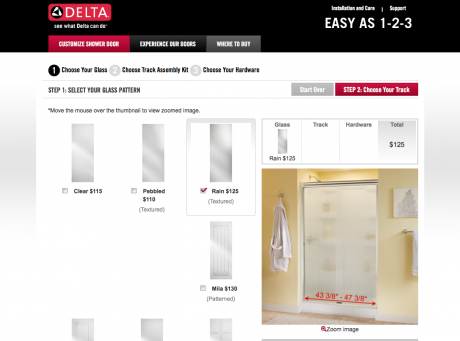
<a href=delta shower doors" width="460" height="341" class="size-large wp-image-25824" />Designing your doors online is fast and easy…

The final step is to select your hardware. There are four styles of towel bars to choose from, depending on your tastes. If keeping it simple is your style, take a look at “Simplicity.” Looking for something with a bit more panache? “Panache” might be just the thing. The other two offerings don’t lend themselves to cheesy references; you’ll just have to look for yourself.

And that’s it, you just designed your own Delta Shower Doors! Just click on “See Your Design” to—you guessed it—see your design. At this point, you’ll also be able to look through several accessories that coordinate with your design, including faucet sets, towel bars, toilet paper holders, drawer knobs and even flush levers for your toilet! Click on “Add To Cart,” and you’ll be taken to the Home Depot web site. First, select your delivery method; you can choose to have it shipped to the nearest Home Depot for free, or to your home for a fee. Proceed to the checkout, pay, and sit back and dream how splendid your baño will look when your designer door arrives!
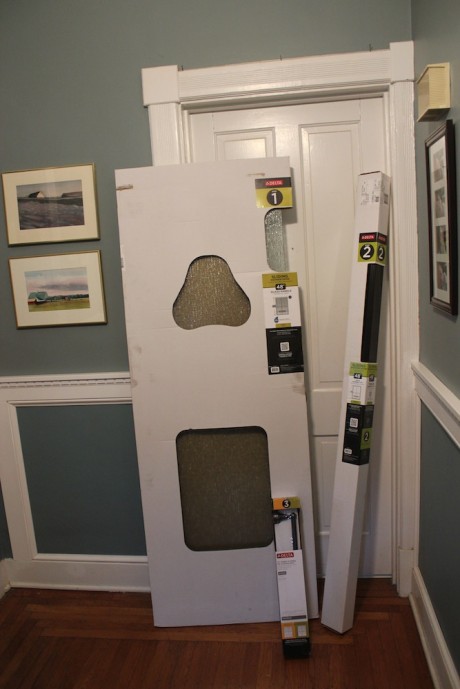
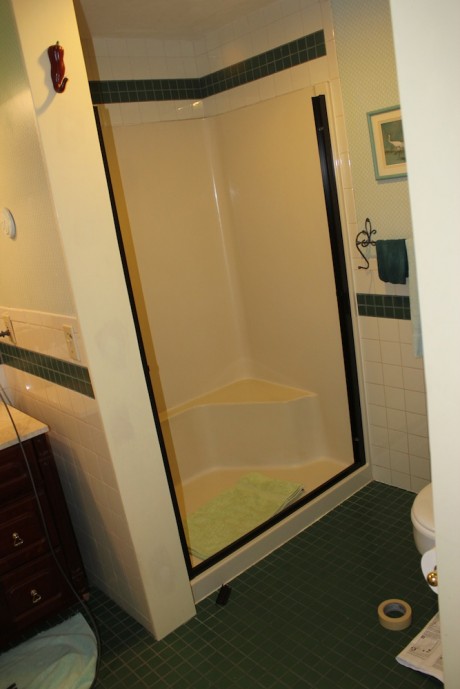
<a href=delta shower doors" width="460" height="689" class="size-large wp-image-25825" />Eight days after ordering, the Delta Shower Doors arrived

The order for my custom doors was placed on October 7th. On October 15th, a big ol’ truck rolled up, and a box of Delta Shower Doors landed on our side porch. Not bad, I’ve had stock special orders take longer than that to arrive. The doors are shipped by ground freight; when they get to your area, the trucking company will contact you to set up a delivery date. If you’re hiring someone to do the installation, tell them when to show up, and your mission is complete. On the other hand, if you have average DIY skills, and some basic tools, you can do your own installation. This will save you some money, and earn you the awe and respect of everyone you meet.

The HomeFixated Guide To Installing Your Delta Shower Doors

If your tub or shower is new, and you don’t have to remove an old set of doors, you have permission to scroll down to “Delta Shower Doors – By The Book.” Otherwise, the first step in the installation process is to make the old stuff go away. If your old doors are still in good shape, your local Habitat for Humanity or other salvaged-goods store may accept it for resale. This accomplishes several things: it eliminates your disposal problem (some trash haulers may not take large items), it keeps usable stuff out of the landfill, and you might even get a tax write-off!

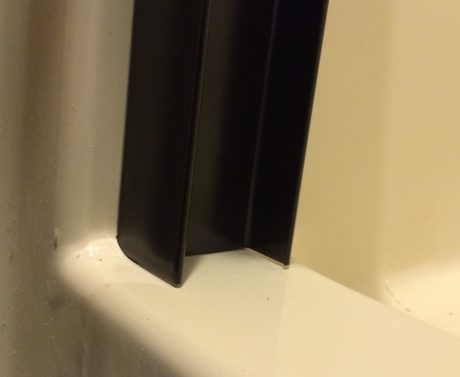
Most shower doors are installed the same way: upright brackets go at either end of the shower, and are screwed into the edges of the tub or wall. A track fits in between them, and sits on the edge of the tub or shower. Finally, the top rail is attached to the top of the edge brackets. After all that is in place, you tip the doors into place, where little wheels glide along an overhead track. Usually there is a center bracket in the bottom track to separate the doors, and hold them into the track. To take it apart, we’ll simply reverse the process. And now for the first HomeFixated tip of the day: spreading a towel on the shower floor will help protect it, and will also keep screws and debris out of the drain.

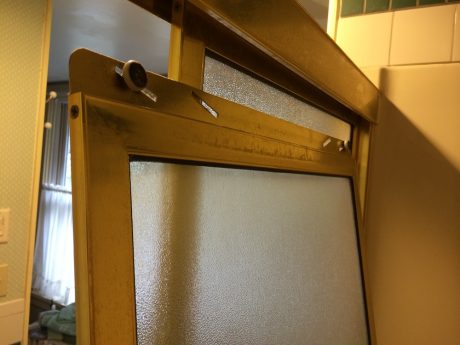
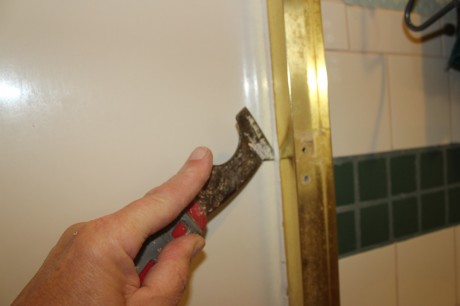
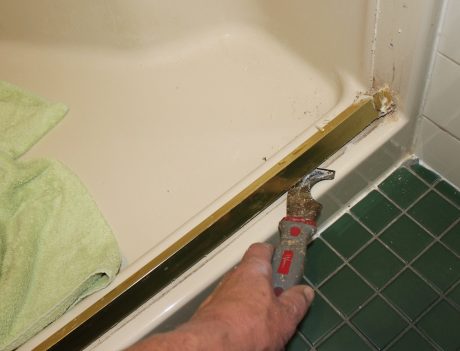
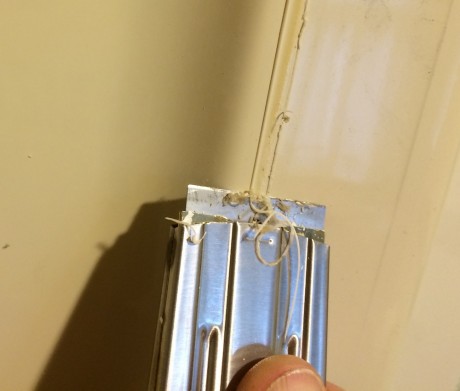
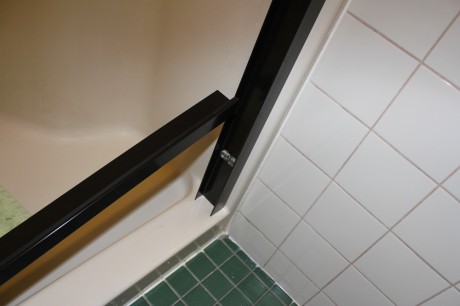
First, pop out the old doors. Usually you can do this just by unscrewing the dividing bracket, lifting up on the doors, and tilting them into the shower. Once the doors are off, unscrew the side brackets and tip them in toward the center. There will probably be caulk wanting to hold them in place; use a painter’s multitool or a flat-bladed razor scraper to convince them to give it up; just be careful not to scratch your walls or chip your surround.
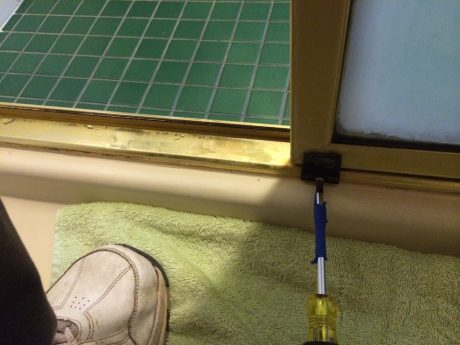
<a href=delta shower doors" width="460" height="345" class="size-large wp-image-25827" />First, remove the divider from the bottom track…<a href=delta shower doors" width="460" height="345" class="size-large wp-image-25830" />Tip the doors in, and pop them out of the top track<a href=delta shower doors" width="460" height="306" class="size-large wp-image-25833" />Carefully break the caulk bond…<a href=delta shower doors" width="460" height="306" class="size-large wp-image-25832" />Unscrew the wall jambs…

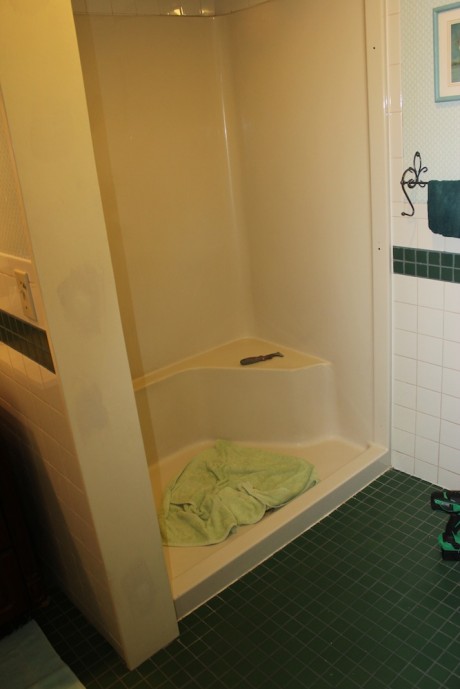
At this point, you should be able to tip the sides and top outward. The bottom rail is usually just held in place by caulk; scrape it off, and the rail should pop right out. Use your flat-bladed razor scraper, and a sponge with some cleaner that’s safe for your shower’s surface, to get the rest of the caulk and years of accumulated nastiness off the entire opening area.
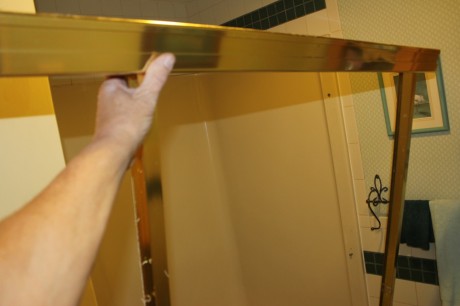
<a href=delta shower doors" width="460" height="306" class="size-large wp-image-25838" />Tip the header and wall jambs out…<a href=delta shower doors" width="460" height="351" class="size-large wp-image-25837" />Break the caulk bond, and pry up the bottom track…<a href=delta shower doors" width="460" height="391" class="size-large wp-image-25836" />Scrape up any remaining caulk<a href=delta shower doors" width="460" height="689" class="size-large wp-image-25839" />Give it a good cleaning, and you’re ready for your new doors!

And that’s it, you’re ready to install your sporty new Delta Shower Doors! If you want to see how the pros do it, Delta has a series of helpful installation videos. The following is their sliding shower door installation video:

[embedded content]

Delta Shower Doors – By The Book

Even if you’ve done a shower door installation before, it’s a good idea to read the instructions. The instruction manual that comes with your Delta Shower Doors is excellent, very clear and thorough. The first page gives a list of all the tools and supplies you’ll need to install your doors, so a good first step is to round everything up. Unpack the doors and rails, and make sure all the parts are there. Some of the parts are stuck in the packing foam, so don’t pitch anything until your installation is finished. I’ll give an overview here, but the manual has much more detail, and is, as they say, profusely illustrated.

The wall jambs go in first. The jambs must sit flat against the shower wall and the threshold; if you have a tile wall, or a tub or shower with a perfect 90° angle where the wall meets the threshold, you’re set. If you have a tub or shower where there’s a curve there, you’ll need to round off the bottom of the side rails to conform to the curve. This is no big deal; the instructions tell you to use a coin to mark the contour onto the jamb. What they don’t tell you is that you probably won’t be able to SEE that mark!
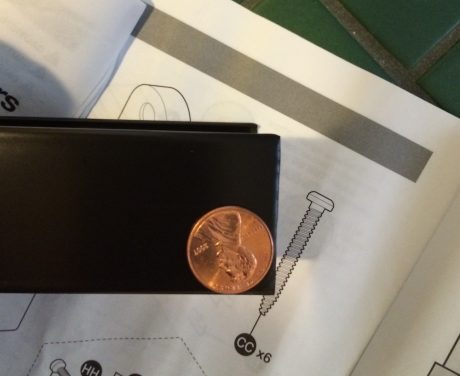
<a href=delta shower doors" width="460" height="376" class="size-large wp-image-25845" />You can use a coin to mark the radius.

A little HF tip: put a piece of masking tape on the jamb, and make your mark on it. Use a pair of tin snips or a hacksaw, and cut to that approximate shape. Finish smoothing it to the right shape with a file or angle grinder. You can also use an angle grinder to do the whole process; that’s what I did, just be careful not to get carried away with it.
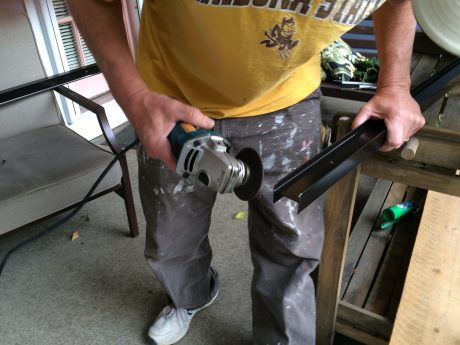
<a href=delta shower doors" width="460" height="345" class="size-large wp-image-25846" />Use snips, a file, or a grinder to shape the jambs.<a href=delta shower doors" width="460" height="377" class="size-large wp-image-25847" />A good, tight fit in the corner.

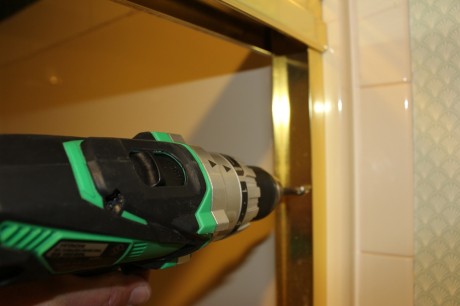
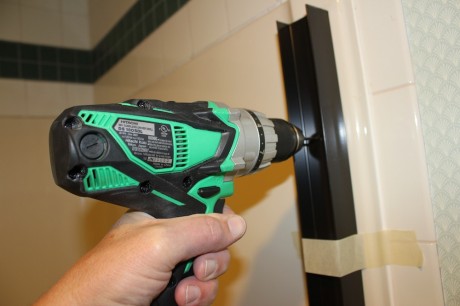
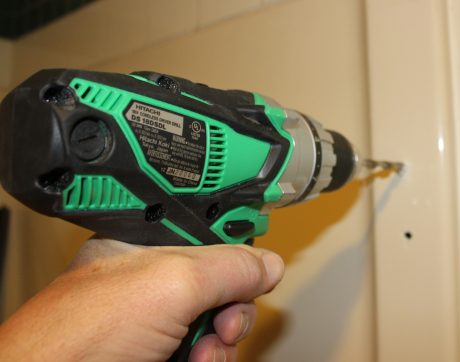
Place the wall jambs against the wall, centered on the bottom ledge. Use your level to plumb them, then temporarily tape them in place. Next, you’ll drill a 1/8” pilot hole through the three pre-drilled holes in the wall jambs into the edge of the shower. Take the jambs back off the wall, and use a 5/16” bit to enlarge the pilot holes.
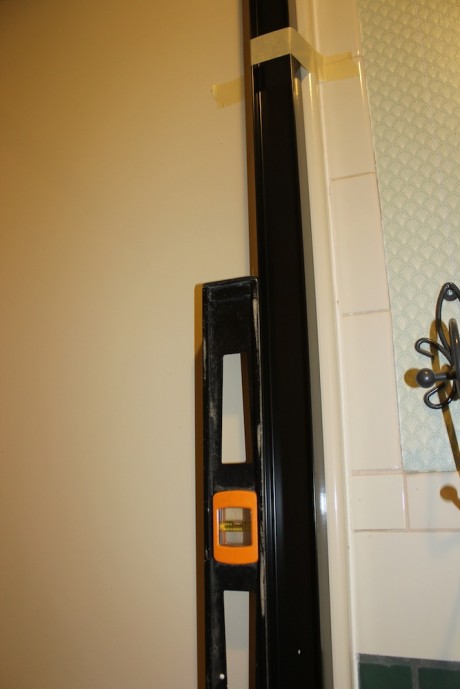
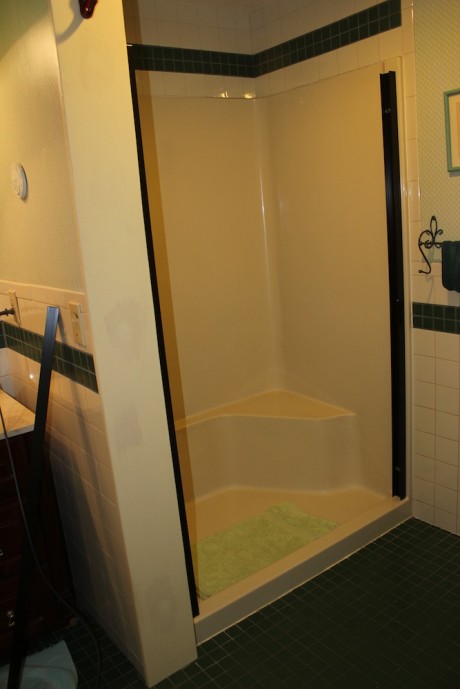
<a href=delta shower doors" width="460" height="689" class="size-large wp-image-25848" />Plumb up the wall jambs. Masking tape holds them in place.<a href=delta shower doors" width="460" height="306" class="size-large wp-image-25849" />Drill 1/8″ pilot holes through the pre-drilled holes in the jambs.<a href=delta shower doors" width="460" height="362" class="size-large wp-image-25850" />Remove the jambs, and enlarge the holes to 5/16″.

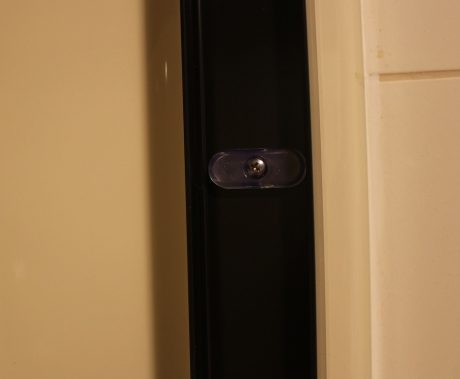
Push the supplied wall anchors into these holes, and snug them in gently with a small hammer. Reposition the wall jambs, and screw them to the wall. Your screws will be used to attach bumpers to the top and bottom holes, and a special center bumper in the middle. Hey—your walls are done!
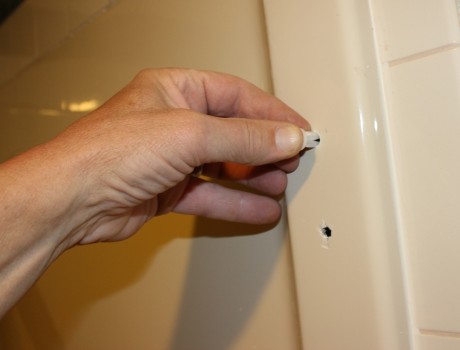
<a href=delta shower doors" width="460" height="350" class="size-large wp-image-25851" />Push wall anchors into the 5/16″ holes unless you’re drilling into a stud…<a href=delta shower doors" width="460" height="379" class="size-large wp-image-25852" />Screw through the bumpers and into the anchors.<a href=delta shower doors" width="460" height="689" class="size-large wp-image-25853" />You’re jambin’!

Laying Some Track

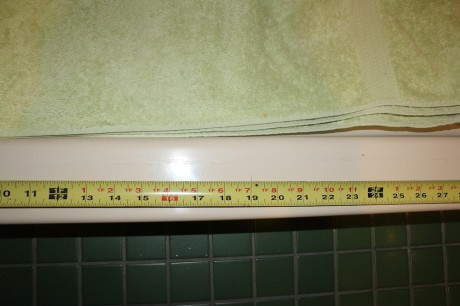
Now it’s time to cut the bottom track. The kits will fit various sizes of tubs and showers; getting an accurate measurement will give you a good, snug fit you need to measure the distance between the two jambs. This can be tricky to do, as it’s an inside measurement. Here’s another HF tip: measure from one end to an even number around the center of the threshold, and make a mark. I chose 24”. Now, measure from the other end to that same mark, and add those two numbers together. My second measurement came to exactly 19”, making my total length 43”.
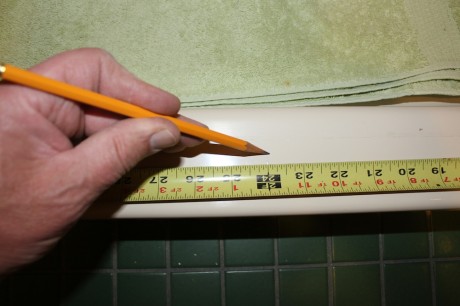
<a href=delta shower doors" width="460" height="306" class="size-large wp-image-25855" />Measure about halfway from one side of the track, and make a mark…<a href=delta shower doors" width="460" height="306" class="size-large wp-image-25856" />Measure to that mark from the other side, and add ’em up.

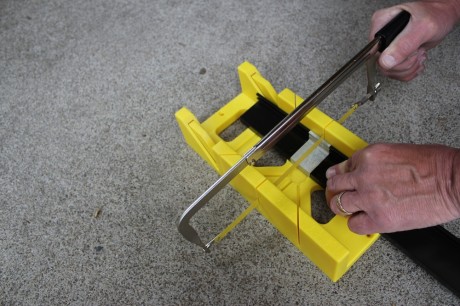
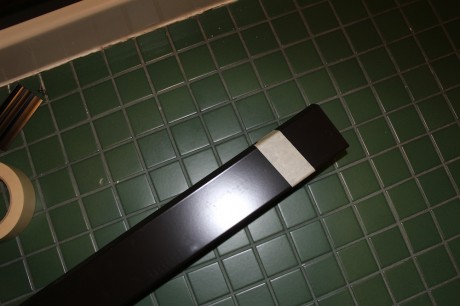
Now you need to transfer that measurement onto your bottom track, and mark it for cutting. Our track hardware was bronze, which makes it really hard to see any marks. I used the tape trick again, putting a piece of masking tape on the track and making my mark on it. To avoid unnecessary foul language and elevated blood pressure, double check your measurements and marks before you cut! You want a nice, square cut, so use a miter box with your hacksaw. Make sure it’s deep enough to accommodate a 3” wide piece of material; that’s how wide my top track was. Make your cut, and use a file to smooth any burred edges. By the way, another tip the folks at Delta repeated several times was DO NOT CUT THE TOP AND BOTTOM TRACKS TO THE SAME LENGTH! They are correct, don’t do it!
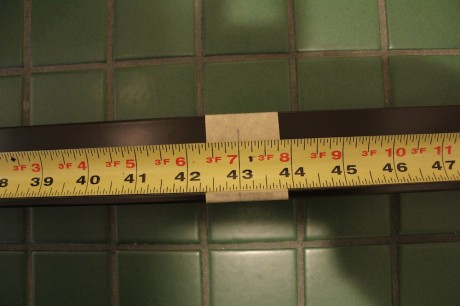
<a href=delta shower doors" width="460" height="306" class="size-large wp-image-25857" />A piece of tape makes your mark easier to see.<a href=delta shower doors" width="460" height="306" class="size-large wp-image-25858" />A basic miter box gives you a smooth, square cut.

There’s a piece of gasket material in the kit; slide it into the groove in the track, and cut it to length. Now test fit your track between the jambs. Undoubtedly, it’s a perfect fit; if not (due undoubtedly to a shoddily-made tape measure or something else beyond your control), remove the track and file it to size. When all is well, fill the groove on the bottom of the track with silicone sealant, and press it into place between the jambs.
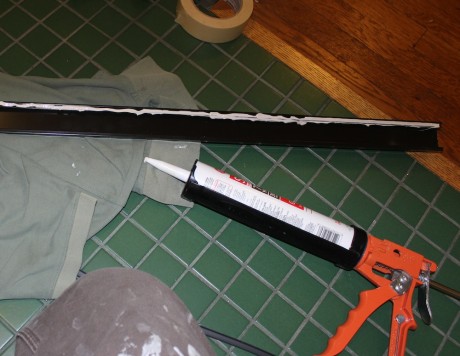
<a href=delta shower doors" width="460" height="356" class="size-large wp-image-25859" />After test-fitting the track, apply silicone sealant underneath it…<a href=delta shower doors" width="460" height="306" class="size-large wp-image-25860" />Insert the track between the jambs, and press it into place.<a href=delta shower doors" width="460" height="689" class="size-large wp-image-25861" />Three sides finished!

Next up: the top track. For this, you’ll measure the distance between the two shower walls, above the wall jambs. This is another tricky measurement to get accurately. If you’re replacing a previously-installed unit, here’s a little cheat that worked for me: measure the OLD upper track, assuming it fit properly. Mine did, so it was easy to get the exact measurement. If you’re not so fortunate, here’s an easy way to get the measurement using materials at hand: take a piece of cardboard from the packaging, and make a mark exactly 12” from a square end of it. (Alternatively, you could use a 12″ ruler or a framing square). Hold the square end against one wall, and measure over from the other wall to your 12” mark. Add the two together, and there you go! Transfer the measurement to the top rail, again using a piece of masking tape, grab your miter box, and make the cut. Again, be sure to double-check your measurement first. De-burr the end, hold the top rail over the wall jambs, and push it into place. The hardest part is done!
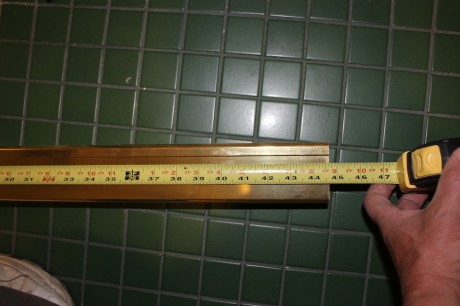
<a href=delta shower doors" width="460" height="306" class="size-large wp-image-25862" />If you removed an old door, just measure the old top track.<a href=delta shower doors" width="460" height="306" class="size-large wp-image-25863" />Mark the top track for cutting.<a href=delta shower doors" width="460" height="689" class="size-large wp-image-25864" />Press the top down over the wall jambs.

I Can See Clearly Now – Or Perhaps Obscurely

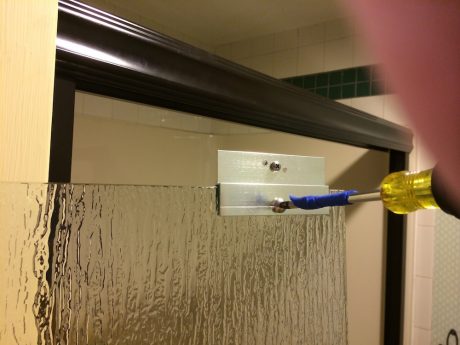
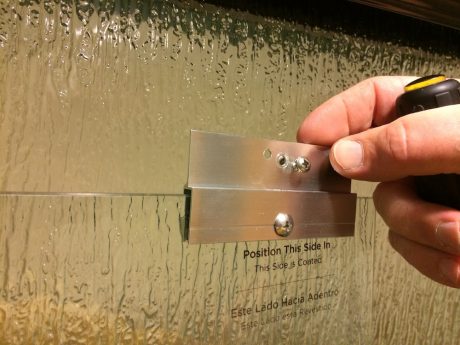
And now for the most rewarding segment of your Delta Shower Doors installation, the shower doors! Remember the foam I told you not to throw away? That’s where the hanger brackets were lurking. Two brackets go on each door; the inside door gets installed first. The doors are identical, so grab one and install the hangars using the pre-drilled holes in the door, making sure the grooved sides of the brackets face the label side of the glass panel. Snug up the screws but don’t go all Incredible Hulk – you don’t want to risk cracking the door, and having to explain to your friends why there’s a blue tarp hanging in your shower opening. Now just lift the door into the upper track, until the rollers rest on the track. Make sure the side of the door with the label is facing in.
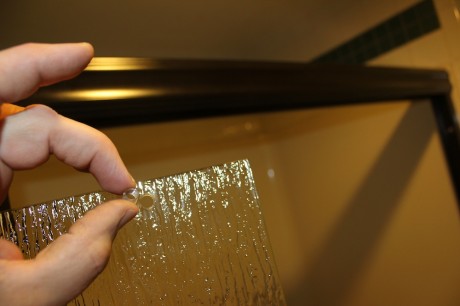
<a href=delta shower doors" width="460" height="306" class="size-large wp-image-25866" />Insert a bushing into the hole…<a href=delta shower doors" width="460" height="345" class="size-large wp-image-25867" />Snug up the door hanger…<a href=delta shower doors" width="460" height="306" class="size-large wp-image-25868" />When both hangers are in place…<a href=delta shower doors" width="460" height="306" class="size-large wp-image-25869" />Lift the inside door into place on the inner rail.

Now repeat the process with the other door, but this time with the smooth side of the bracket facing the label side of the door. Lift the door into the top track, making sure the bottom of the door is inside the bottom track. Wow, it’s starting to look like a shower!
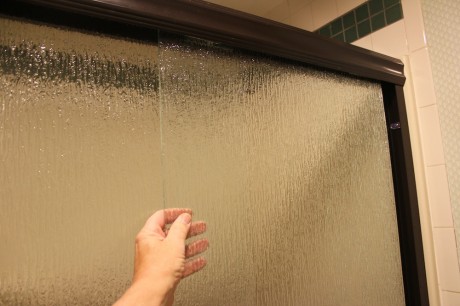
<a href=delta shower doors" width="460" height="306" class="size-large wp-image-25870" />Now repeat the process with the outer door, and lift it onto the track.

If the doors don’t meet the walls properly, they can easily be adjusted. Pop the door back out of the track, and loosen up the rollers. There are three holes the roller can be inserted into; to raise the glass, use the lower hole. To lower it, use the upper hole. Snug the roller up, and re-hang the door.
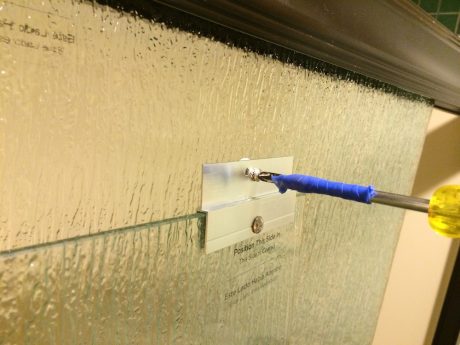
<a href=delta shower doors" width="460" height="345" class="size-large wp-image-25871" />To adjust the door, remove the screw that holds the wheel on…<a href=delta shower doors" width="460" height="345" class="size-large wp-image-25872" />Use a lower hole to raise the door, a higher one to lower it.

Once the doors are aligned properly, it’s time to install the divider on the bottom track. Measure the bottom track, find the center, and position the divider there, with the doors in the grooves. Drill 1/8” pilot holes through the edge of the divider into the bottom track, and secure it with the two self-tapping screws. Your Delta Shower Doors are secure, and you’re almost finished!
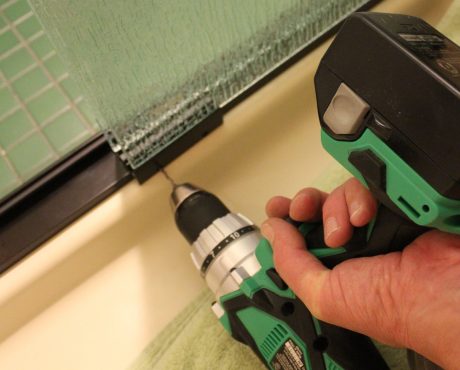
<a href=delta shower doors" width="460" height="370" class="size-large wp-image-25873" />Center the lower divider, drill pilot holes, and screw it into place.<a href=delta shower doors" width="460" height="689" class="size-large wp-image-25874" />Almost finished!

Sealing the Deal

To keep the water on the inside of your beautiful new Delta Shower Doors, take your silicone sealant and seal along the entire length of the wall jambs and bottom track, both inside and out. 100% pure silicone works best, and there are varieties made specifically for bathrooms, with mold inhibitors. All that’s left to do is install the door handles or towel bars you selected. The exact installation will vary according to your hardware, but all are designed to be used with the pre-drilled holes in the door.
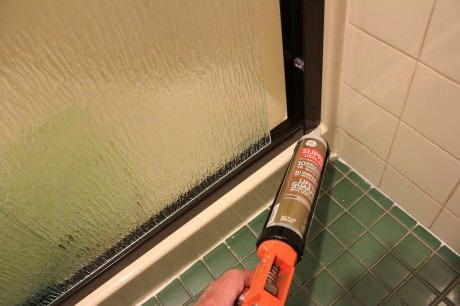
<a href=delta shower doors" width="460" height="306" class="size-large wp-image-25875" />Use good silicone sealant around the entire inside and outside of the track.

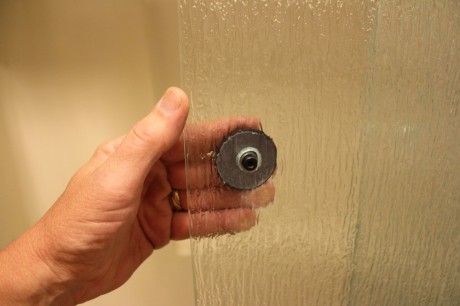
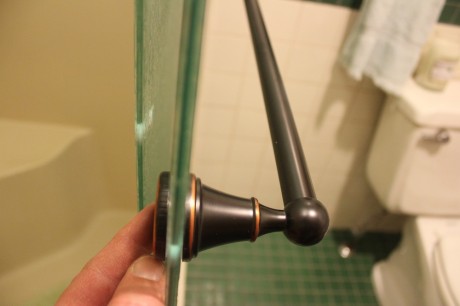
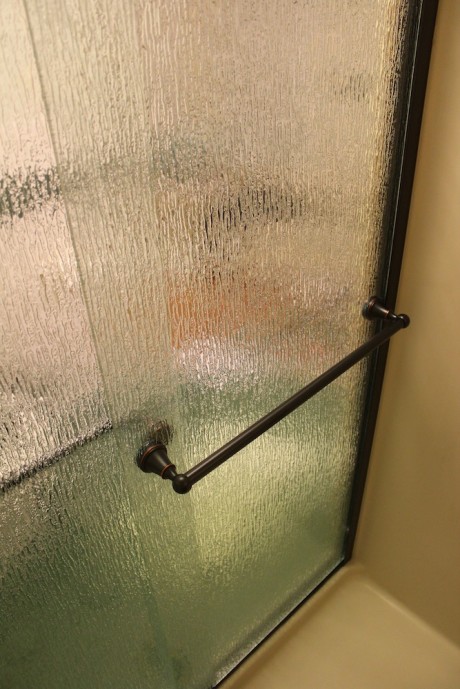
Mine was very straightforward. I just inserted the rubber bushings into the holes in the door, slid a rubber gasket over the escutcheon and the handle post, and threaded them together through the hole. I installed one end, then put a bit of silicone on the towel bar, slid it into the post, and installed the other end. Easy peasy!
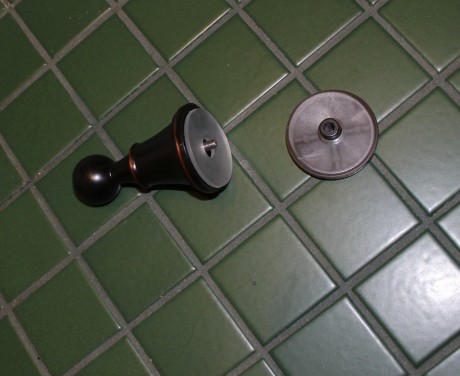
<a href=delta shower doors" width="460" height="376" class="size-large wp-image-25876" />No tools are needed for this towel bar, the pieces are threaded.<a href=delta shower doors" width="460" height="306" class="size-large wp-image-25877" />Hold the back piece up to the door…<a href=delta shower doors" width="460" height="306" class="size-large wp-image-25878" />insert the other side, and spin it snug.<a href=delta shower doors" width="460" height="689" class="size-large wp-image-25879" />Towel bars in, and lookin’ good!

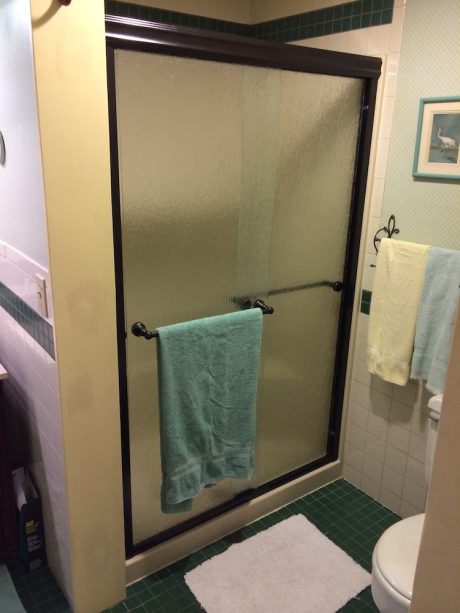
I summoned my wife, and we stepped back and admired the transformation, what a difference! It looked great, until I opened the door and saw the old faucets and drain. Replacing them will be our next move, the spiffy new doors made us realize just how crappy the old fixtures had gotten over the past three decades. Meanwhile, the Spousal Seal of Approval was issued.
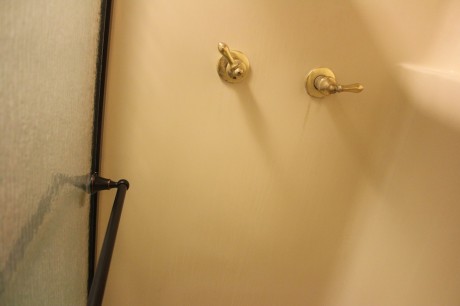
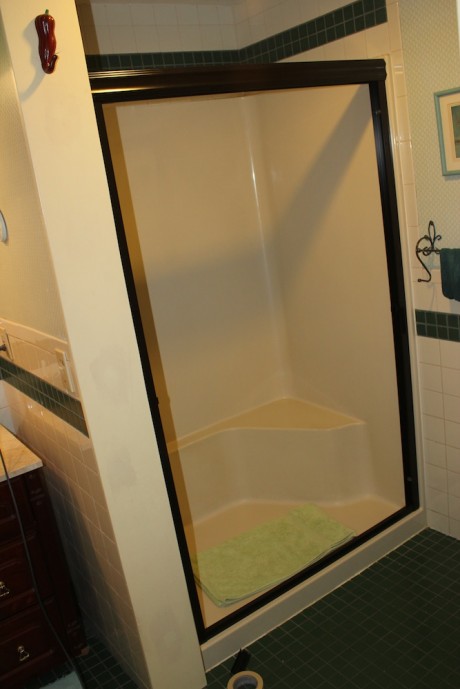
<a href=delta shower doors" width="460" height="306" class="size-large wp-image-25880" />The new hardware highlights how beat the old fixtures are…<a href=delta shower doors" width="460" height="613" class="size-large wp-image-25884" />But the doors look great!

Design Your Own Delta Shower Doors

I think the custom Delta Shower Doors concept is great. The materials are very good quality – the weight on the shower doors was about twice that of those I took out. Fit and finish is excellent, everything you need to do the installation is included, and the instructions are very good. The design and ordering process was quick and easy, and the available options should enable most buyers to design a set of shower doors that’s exactly what they want. The only quibble I had with the entire process was that it’s difficult to see exactly what the various types of glass look like, at least that was the case on my Mac. Some higher-res photos might help with that.

Pricing is very competitive with stock units, where you’re limited to whatever configuration happens to be on the shelf. With the Delta Shower Doors, you’re the boss. Don’t like pebbled glass? Go with the Mission style. Tired of the polished brass (yep!)? Get the rubbed bronze or brushed nickel. Got some fancy shmancy towel racks on the wall? Get a matching fancy shmancy towel bar on your shower door.

The flexibility is great, you can get exactly what you want, and you can control the cost. I designed a similar setup in chrome, with pebbled glass, and the total cost came to $210. You can further control your costs by choosing to pick up your Delta Shower Doors at a nearby Home Depot for free, but if your schedule is crazy, you can have it shipped to your home for $55 or so. The doors come with a limited five-year warranty.
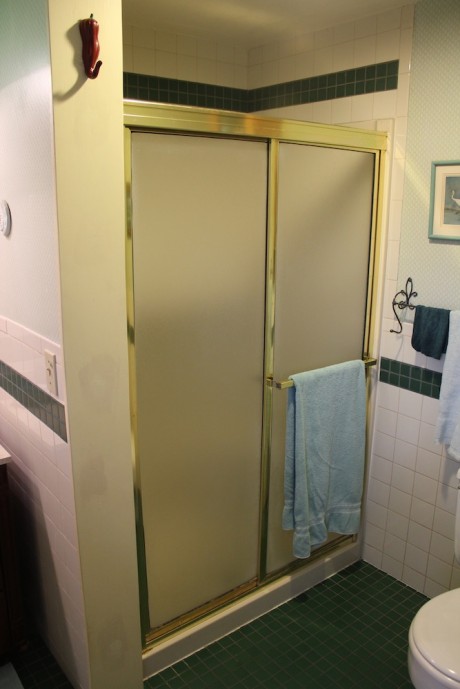
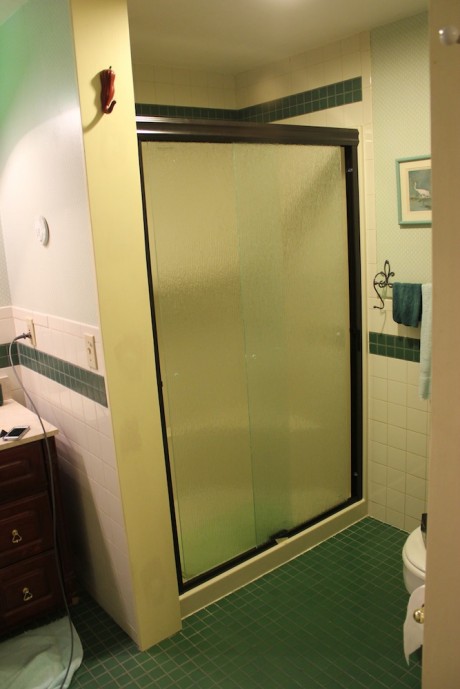
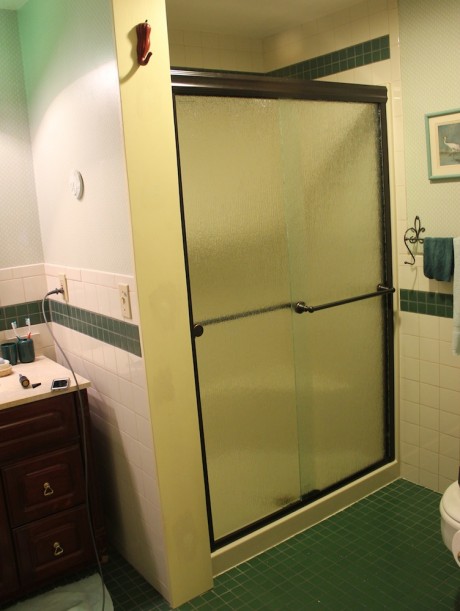
<a href=delta shower doors" width="460" height="689" class="size-large wp-image-25891" />Before…(not bad from a distance; scary up close)<a href=delta shower doors" width="460" height="611" class="size-large wp-image-25883" />And after–three hours after, to be precise!

Ready for the three-step program? Design YOUR custom doors before November 3rd, 2014, and you can enter a sweepstakes to win $1,000 or your own set of custom Delta Shower Doors!

More Info - via DeltaShowerDoors.com